Showing posts with label crafts. Show all posts

Wednesday, October 29, 2014

Preserving Leaves with Paraffin Wax


The leaves are just beautimous right now.

Brilliant oranges and yellow..we even saw a magenta tree the other day.

Recently, Josiah and cousin Maddy found some really gorgeous leaves at the farm.

I mean really. Aren't they stunning? I don't know where these particular leaves come from. I need to ask my Dad and get back to you. I think he has a pet name for every tree at the farm. Especially his beloved fruit trees ('nother story for 'nother day).


Anyhoo. My mom had the idea that Josiah and I could preserve them. She wanted to share their loveliness with her sweet friends at the nursing home (she works there). She sent me home with a baggie of paraffin wax.

I do wish I had a paraffin wax melter. I have used one when doing nails (beauty school and salon days), but don't have one of my own. I am pretty sure you could use a crock pot as well. I heated our waxy in the microwave.

This isn't a very good picture, but here Josiah and I both have a leaf on the verge of dipping it in. I tried to choose leaves that didn't have any tears or obvious blemishes in them.


I also made a huge mess. Of course, I did! Did you expect anything different. I was intending on using wax paper, but thought I had run out. Until I found my wax paper in a bag I had taken to a friend's house to roll out pie crusts on. I won't even tell you how long ago that was.

Girlfriend needs a nap.

I used foil instead to cover my table. I heated up the wax in my Pampered Chef mixing bowl, but it still got really too hot. And then it cooled too quickly.


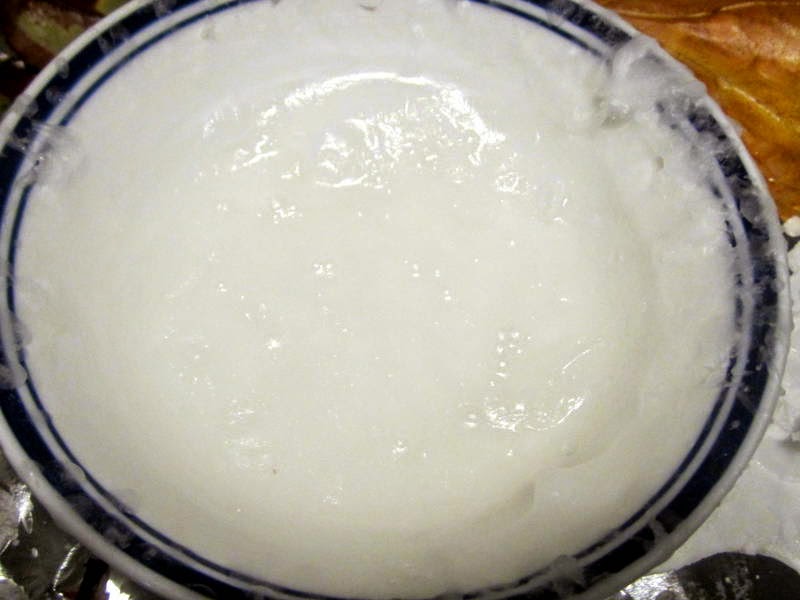
Lovely. The wax made a film just after a few minutes of being in bowl.


Despite my mess, I had some really nice results. 


You can see how it looks when the wax wasn't hot enough. It just didn't cover as well.


The leaves that came out right have a beautiful sheen and are sturdy. We even sent two to Qatar. No really! Josiah's Aunt is stationed there. We wanted to share the fall loveliness.


I am going to put some in a bowl to enjoy on my coffee table and the rest I am sending to the Nursing Home.

What are you doing to enjoy the fall?


Tuesday, February 4, 2014

All you need is love (and a little burlap): Valentine's Crafts


I love making stuff. Some stuff I make better than other stuff.

My favorite way to make stuff is using stuff I already have around the house. Or that I find at the Thrift Store.

There is something very satisfying re-purposing what I already have. Or making something new out of what someone has discarded. Not that I have ever dug in the trash for anything (uninteresting). 

I want to share a few projects that I've made with this and that. Maybe they will inspire you to use your odds and ends to add a little something special to your Valentine's Day. No special supplies necessary.

The picture below is the top of one of our bookshelves. Most everything I keep up all year long. The mirrors, lamp, books and baby doll are permanent residents of this particular bookshelf. The dwarf (from Snow White) was my grandmother's and is older than dirt. As is the baby. The red letter "T" is one I found at the Thrift Store. It was a country blue, but I grabbed the craft paint and made it mine. The red polka dotted flower actually is one I wear. I love polka dots. They make me happy.

I had originally stuck my wreath up there just to look at it from a distance and decided I liked it where it was.  I used a purchased foam wreath (it was the only thing I bought this year) and my leftover burlap to wrap around it.  Doesn't everybody have leftover burlap? I thought about using leftover sheet music (yes...I have some of that, too), but the burlap was calling my name. "Beke...Oh, Beke." Man, I need a nap!


Pay no mind to that hand. Unless you want to come give me a manicure.A few years ago, I purchased one of those large containers of paper flowers at Hobby Lobby. I have used them a number of times. I was going to decorate my wreath with fabric flowers, but this was so much easier. I have made flowers out of scrapbook paper, coffee filters, fabric, paper bags, old patterns and trash. I have a bit of a problem. Help me.


I also hot glued beads and buttons from my stash to add extra texture and dimension. My point is that you shouldn't feel like you have to go out and purchase new supplies whenever you create. Look around at what you already have. You can use anything to embellish with...spray paint some dried beans, old buttons from discarded clothing or broken jewelry. Some of my red beans are from a cheap necklace I had that broke. 


On the other side of the wreath I pinned a vintage card that I've had for years. I didn't use hot glue, because I might want to use this little girl another time. I love using old things. If you don't have any old things (other than yourself) you can always use your printer to print vintage cards or graphics. Or even use a handmade valentine from one of your children. I saw a cute wreath this year that used the "heart" cards from a deck of cards. It was darling.


These little birds are ones I purchased several years ago. They migrate from place to place. I like to spend my money on things that I really like...and that can be used in a variety of vignettes.


The last little thing I want to show you on my bookshelf is this sweet little valentine. It used to have a little printed tag that said, "I'm sweet on you." There is no telling where it has gotten off to. It probably joined our runaway socks.


A few years ago, I taught a card class at a nursing home. To make it easier, my mom and I cut all of the pieces we needed for the cards ahead of time.The ladies that were in the class were of varying degrees of ability and mental capacity. These cards were simply a pick and paste project.

 We all had such a lovely time making them. And the ladies were so proud of their creations.

 What is nice about creating Valentine's with what you have is that each one truly becomes unique. By the way....the bottoms of the cupcake were made from the innards of a piece of cardboard. Everything else was from the scrapbooking stash.


You can even use the kitchen to make extra special Valentine treats. Josiah and I like making playdough to share with little friends.One of our favorite recipes is this kool-aid recipe. The playdough smells so yummy! I used supplies from my scrapbooking stuff and snack baggies to package our playdough. I purchase kool-aid every now and again to keep just for this purpose. Over Christmas we made Gingerbread playdough, but the kool-aid playdough is wonderful for any special event...just pick your poison (literally).


I have a few other plans for this year. I love these Paper Bag Treat Bags and these Stuffed Paper Hearts. They might show up in the next few weeks. Paper Bags are always in great supply at our house, but I am sure any paper material would work.

Before you go and dig through your trash (just don't tell my husband I encouraged this), Check out how I used the same principles of "using what you have" to decorate and craft last year for Valentine's by clicking the graphic below. Have fun!

http://chargeforwhining.blogspot.com/2013/02/my-simple-valentine-maybe.html


I am linking up this post to the TOS Valentine's Day Resources Round Up. I am excited to see what everyone has posted this year! You can see for yourself by clicking on the banner. It goes live February 5!


Valentine's Day RoundUp

Monday, July 22, 2013

My Scrappy Owls


I love owls. And I'm not the only one. You see owls everywhere nowadays.

One of my favorite owl projects to make is my Scrappy Owl Pillow. I basically make cute little owls out of bits and pieces found in the deep caverns of my fabric buckets.

And they are really simple bimple. I have made quite a few...and then a few more.

I am going to attempt to show you how I do it. Attempt. That's the key word there. Try and keep up.

First of all you need some sort of pattern. I, unfortunately, cannot supply that for you. I recommend you go to my Owl Always Love You Pinterest board and see if there is one there that floats your boat.

Pinterest is full of cute little owl pillow ideas. If you are good with a pencil you can also try and free hand a pattern. I don't think it would be all that difficult.

I cannot speak to that because I got my pattern from somewhere. It's been in my possession for a while now and I can't remember from which it came. You know how that is.

For this particular project I used a variety of different fabrics. I'm all about adding yellow "notes" to my pictures now. It's out of control!  I made these owls for 2 sweet little girls. Thus...the sweet little girly fabrics.  I have used old quilt blocks, clothing I've found interesting in the past....if you can cut it up and stitch it you can use it!


Put the (right sides together) owl face and body together and sew!


Next, sew on the owl wings. I just sew a zigzag stitch around the raw edge. Gives it character! Here is a fun fact. I always use my zigzag stitch. Mostly because the straight stitch on my machine is wonky. 


After the wings are attached I usually add a little trim. Just because it makes me happy. I'm easy that way. 

For these little owls I am adding fabric eye circles under my felt eyes. You will see what I mean in a minute. I also added layers of tulle under the eyes to add some texture.


Now that the front of my owl pillow is complete I cut out my back. Why do I do that? I will tell you! Because my owls are "scrappy" the scrappy parts sometimes don't fit the finished pattern. I cut out the back material around my finished front so that everything fits together. For these owls I used some soft flannel. Also found lurking in the deep caverns of my fabric buckets.

I also notice that I am in desperate need of a manicure.


After I stitched around the pillow (leaving a bit open for stuffing purposes), I noticed I needed to trip up a few uneven edges. This makes the owl all neat and tidy.

Not to worry. Soon after I took this picture I gave my nails a proper coat of polish. 'Bout time!


Here is the almost finished product.


Here is thee second owl I was making at the same time. Cute!

 I stuffed both owls with pillow fluff (my technical term) then stitched a top stitch along the edges of the pillow. This takes some maneuvering and a steady hand, but it adds a little something special. I used to not do it, but I saw some pillows that where like this. I was inspired.


Viola! The finished product. I used felt for the eyes and beak. Sometimes, when I have plenty of time to sit on my couch, I hand stitch the felt eyes and beak on with embroidery floss. However, this was a hot glue kind of event. You know how that goes.


And here is the other one. All fun and whimsical. And ready to be treasured by a special little girl.


I hope I've inspired you to create! 

Wednesday, May 15, 2013

Playing with Fire: A Flower Pin Tutorial


Wow! This is getting to be a habit. Blogging for 3 days in a row. Something must be up.

Actually, I'm feeling kind of puny tonight. I think it's probably my allergies. I'm allergic to Spring.

Speaking of Spring.

This is what it looked like at my house around the first of May.


 It is really startling to see all that green intermixed with snow.


We were all in just a little bit of shock. Most of us have put up our winter clothes for the season by now. But, never fear. We hillbillies are an adaptable bunch.


I think warmer weather has finally settled upon us now. And for Mother's Day, Josiah and I made some cute little flower pins for the ladies at church.

Before you get all worried that I"m subjecting my son to arts and crafts unnecessarily (I'm mean, flower pins?) let me reassure you that it was plenty manly.

There was fire involved!!

I am going to show you how we made them.

First of all, you need to choose some satiny fabric. Cotton fabric will not melt. It will just catch on fire. There are even some fabric that I have that is a little more "satiny" in texture, but won't melt. The best I've found is just the inexpensive satin fabric. You can get it for 2.99 a yard at Hobby Lobby. I'm always haunting the remnant bucket at the fabric store. You can do a lot with a remnant.

Then you will need to cut out at least 3 different sizes of circles. I used 3 different sizes of drinking glasses as my templates. I do have patterns I've made somewhere for these, but I can't be bothered with things like patterns when I'm in a hurry! I've got to make things more difficult for myself! I used 4 of each size in our flowers, plus a contrasting color for the middle.

Just a note. I have a pair of nice fabric scissors. However, I think my nice fabric scissors have run away from home. Maybe 'cause they are feeling neglected? I don't know. If you see them please send them back my way...and tell them I'm sorry. I had to use a busted up pair of "whatever" scissors. I felt like I was hacking and sawing. Though with this project it doesn't matter as much.  The fire will take care of all those little imperfections.


 This is just part of the process when crafting with an 11-year-old boy. Somebody thought it would be interesting to see what happens when matches float in candle wax. He then thought maybe I might not notice.


I do have a little tip. Anytime you sew or do any kind of craft you need to hang out little trash bag for easy access. My mama taught me this a long time ago. And I'm passing it along to you. Feel free to share my wisdom.


For this particular burning exercise I would suggest you use a tall pillar candle. Jar candles aren't as easy to use. It also might take a little practice to keep from burning your fingers.. You just need to simply run the edge of all your satin circles through the fire.It won't take long. Just keep the circle moving.


Now does this look like a man who is making delicate flower pins? I think not. He is experimenting with fire. With my close supervision, of course. He is 11, after all.  I did have to keep the crafting train a'moving. He was generally more interesting in the experimenting part of the whole thing. Naturally!


Here are several finished satin circles. You can see that the edges are nicely melted. You can also hold the middle of your circle directly over the flame and it will give the circle a little more character.


You can see what I mean in this picture. I don't melt all the middles of every flower circle...just enough to make the petals more realistic looking.


Ignore the nasty glue gun. Good Grief! I sure enjoy my glue gun. I'm surprised it hasn't run away from home (along with my good scissors). You can assemble the flower pins either with hot glue or by hand stitching them (needle and thread). A lot of my flower pins I use needle and thread because I just like the look. Here, however, I have chosen hot glue. It is quick and makes the pins sturdy.


Just start stacking and gluing, beginning with your larger circles and moving on up. I also stagger them just a bit (not directly centered on top of each other). I think that makes them more interesting looking.


Here is my finished flower. You can see I used a contrasting color for the middle and then glued down a button. I also glued a circle of felt on the back of the flower so I could attach a pin. Cuteness!


Here are the finished flowers. Some of them I added lace in between the satin layers to make them more feminine. All of our church ladies looked just fetching in their flowers.


So have I inspired you to play with fire?

Contact Form

Name

Email *

Message *